Converting PDF Documents
Note: All conversions will be applied only to the selected content. To learn about content selection, see Selecting Content.
Converting PDF Documents to Microsoft Word
There are two ways to convert PDF to Microsoft Word:
On the Menu bar:
Click on the File menu and then on Open and browse for the PDF that you want to convert to Word. Click on the Convert menu and then PDF to Word.
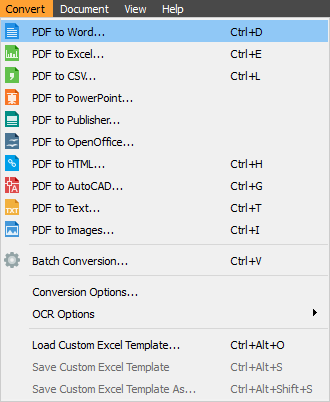
On the Toolbar:
Click on the Open icon to browse a PDF you want to convert. Click on the Word icon ![]() to convert a PDF to Word.
to convert a PDF to Word.
Select content for conversion Note: To learn how to select content, see Selecting Content.
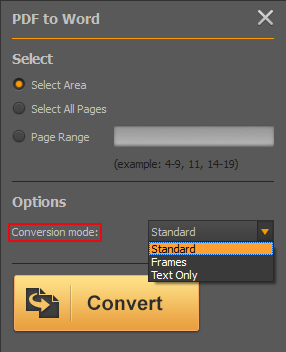
There are three PDF to Word conversion modes to choose from:
- Standard conversion delivers the best output for most documents. It retains background graphics and textual layout.
- Frames conversion delivers the output with the background graphics and layout of the selected pages and items. In that case, the text appears in individual text boxes in a new document.
- Text conversion converts only the textual part of the selected content. This conversion mode is recommended when the user wants to edit or use only the text portion of the PDF.
Converting PDF Documents to Microsoft Excel
There are two ways to convert PDF to Microsoft Excel:
On the Menu bar:
Click on the File menu and then on Open and browse for the PDF that you want to convert to Excel. Click on the Convert menu and then PDF to Excel.
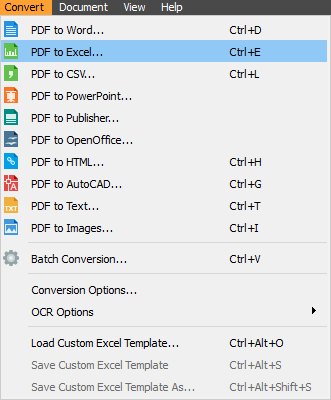
On the Toolbar:
Click on the Open icon to browse a PDF you want to convert. Click on the Excel icon ![]() to convert a PDF to Excel.
to convert a PDF to Excel.
Select content for conversion Note: To learn how to select content, see Selecting Content.
Automatic and Custom Conversion: With complex tables, it may happen that you don’t get a perfect result when converting PDF to Excel automatically. If conversion result is not in alignment with the original tables set, use custom PDF to Excel conversion, to personalize your spreadsheets and designate the visual look of your tables before conversion.
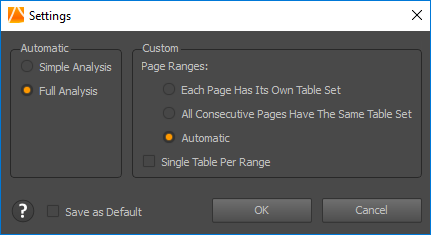
How to use Settings button on the side bar
For automatic conversion: choose between simple and full analysis. If your PDF contains simple tables and basic, try simple analysis. Full analysis is set up by default.
For custom conversion: here you can set up Page Ranges option. You can choose from:
- Each table has its own table set: If you want to personalize only the table on a specific page, choose the first option. In that case, every page has its own settings.
- All consecutive pages have the same table set: Table structure that you set up with Advanced options can apply to all consecutive pages.
- Automatic: the program will automatically decide how tables should be set up.
- Single table per range option should be checked if you want to generate only one specific table on the page.
If you want to save the settings, slick the Save as default option.
How to use Advanced Options button
Page range section: If you have a large document and you don’t need to personalize all the tables, choose the pages you want to apply custom conversion to. Click Extend to add more pages to your page range settings, or Exclude to remove a page from the page range.
Tables section: Add more tables or delete existing ones, by clicking on the relevant button and dragging a table with the mouse. If you are not satisfied how tables look, click the Replot button.
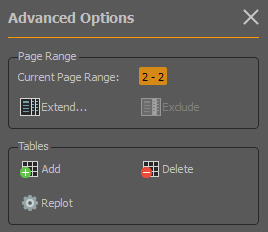
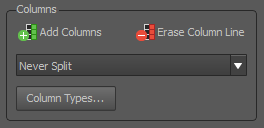
Columns section: To add an additional column, click the Add Columns button and then click on document exactly where you want to place a new column. If you want to delete the column, first click on Erase Column Line button and again on the document, where the column you want to remove is placed. To choose how the content within the cells will be treated, use one of the following options from the drop-down menu: Never split, Always split, Split only between two words, Split if 2 spaces between words, split if 3 spaces between word. To choose how the content within tables will look like, click the Column Types button.
Rows section: First tick the Show rows box to see all the rows in the document. Also tick the Manual row editing box in order to enable other buttons. To add an additional row, click the Add Rows button and then click on the document exactly where you want to place a new row. If you want to delete a certain row, click on Erase Row Line and then click on the document exactly where the row is. If you need to choose a specific column to differentiate the rows in a specific column table, click the Rows settings button and select the table you need to work with. Then select the scheme you want to use to differentiate the rows and click OK.
Header and Footer section: If you want to show headers and footers click on the Settings button and tick the boxes Enable Headers, Enable Footers. If you want to edit headers and footers, click on one of the buttons and drag the header/footer accordingly.
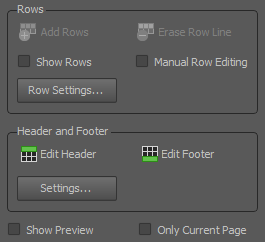
Show Preview: tick this box if you want to preview the conversion result before actual conversion.
Only Current Page: Tick this box if you want to see the preview only for current page. This option is particularly useful for large documents.
When you are done, click Convert button.
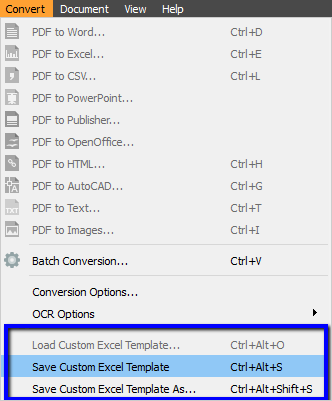
If you want to save these custom Excel settings you’ve made for future use, before clicking on the Convert button, go to Convert menu and click on Save Custom Excel Template. Choose the name of the file and its location. Next time when you want to apply the same custom Excel settings to a PDF, click on the Convert menu bar and then on Load Custom Excel Template. Type of conversion is to Excel by default, but can be changed from Conversion Options under Excel/CSV tab by changing ‘Default action for Convert Button under Advance action Panel’ option to CSV.
Converting PDF Documents to CSV
There are two ways to convert PDF to CSV:
On the Menu bar:
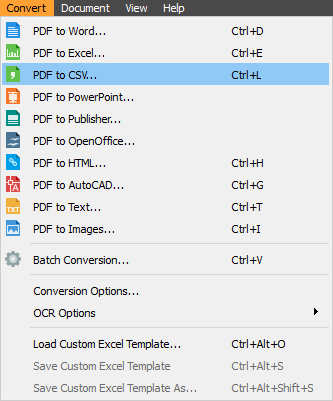
Click on the File menu and then on Open and browse for the PDF that you want to convert to CSV. Click on the Convert menu and then PDF to CSV.
On the Toolbar:
Click on the Open icon to browse a PDF you want to convert. Click on the CSV icon ![]() to convert a PDF to CSV.
to convert a PDF to CSV.
Select content for conversion Note: To learn how to select content, see Selecting Content.
How to use Settings button on the side bar Note: To learn how to select content, see Converting PDF documents to Excel.
How to use Advanced Options button Note: To learn how to select content, see Converting PDF documents to Excel.
There is a small difference between PDF to CSV conversion comparing to PDF to Excel. When you convert a PDF to CSV for the first time, a small window will pop up asking you to choose CSV delimiter options. Next time you apply the same conversion type, the window won’t show up. If you want to make changes again, you need to go to Conversion Options.
Converting PDF Documents to Microsoft PowerPoint
There are two ways to convert PDF to PowerPoint:
On the Menu bar:
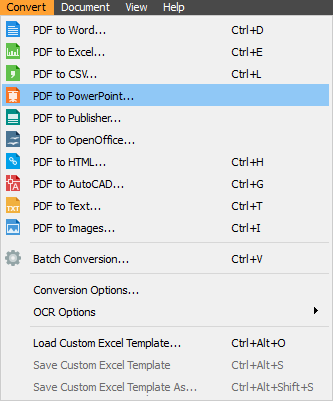
Click on the File menu and then on Open and browse for the PDF that you want to convert to PowerPoint. Click on the Convert menu and then PDF to PowerPoint.
On the Toolbar:
Click on the Open icon to browse a PDF you want to convert. Click on the PowerPoint icon ![]() to convert a PDF to PowerPoint.
to convert a PDF to PowerPoint.
Select content for conversion Note: To learn how to select content, see Selecting Content.
Converting PDF Documents to Microsoft Publisher
There are two ways to convert PDF to Publisher:
On the Menu bar:
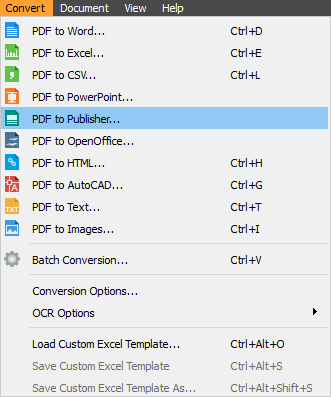
Click on the File menu and then on Open and browse for the PDF that you want to convert to Publisher. Click on the Convert menu and then PDF to Publisher.
On the Toolbar:
Click on the Open icon to browse a PDF you want to convert. Click on the Publisher icon ![]() to convert a PDF to Publisher.
to convert a PDF to Publisher.
Select content for conversion Note: To learn how to select content, see Selecting Content.
Conversion Modes
There are three conversions modes to choose from:
- Standard mode gives the optimal conversion results for most documents. All contents are placed in one frame, while images and other objects are placed in separate frames.
- Frame per Paragraph mode places each paragraph into a separate frame. It is most suitable for editing or rearranging the content of your document.
- Frame per Token mode. Token is actually the smallest recognized group of the items on the page. This conversion mode creates a maximum number of frames available and allows for maximum editing flexibility.
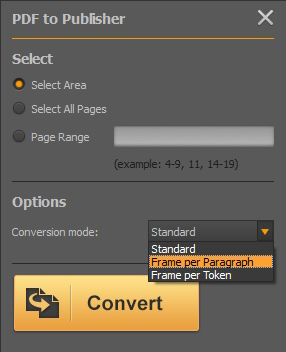
Once you choose the conversion mode, click the Convert button.
Converting PDF Documents to OpenOffice
There are two ways to convert PDF to OpenOffice:
On the Menu bar:
Click on the File menu and then on Open and browse for the PDF that you want to convert to OpenOffice. Click on the Convert menu and then PDF to OpenOffice.
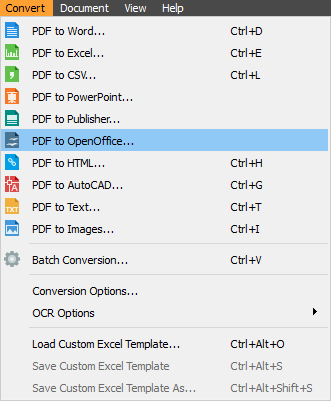
On the Toolbar:
Click on the Open icon to browse a PDF you want to convert. Click on the OpenOffice icon ![]() to convert a PDF to OpenOffice.
to convert a PDF to OpenOffice.
Select content for conversion Note: To learn how to select content, see Selecting Content.
Conversion Modes
There are three conversions modes to choose from:
- Writer is the word processor, an alternative for Microsoft Word.
- Calc mode is for converting PDFs to editable spreadsheet documents.
- Impress mode converts PDF documents to editable presentations.
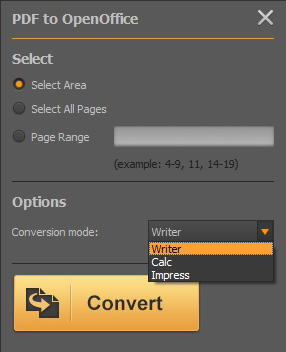
Click the Convert button once you choose the conversion mode.
Converting PDF Documents to HTML
There are two ways to convert PDF to HTML:
On the Menu bar:
Click on the File menu and then on Open and browse for the PDF that you want to convert to HTML. Click on the Convert menu and then PDF to HTML.
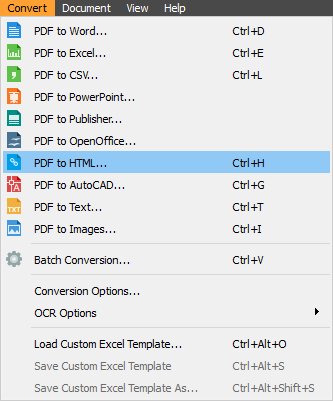
On the Toolbar:
Click on the Open icon to browse a PDF you want to convert. Click on the HTML icon ![]() to convert a PDF to HTML.
to convert a PDF to HTML.
Select content for conversion Note: To learn how to select content, see Selecting Content.
Click the Convert button to convert a PDF to HTML.
Converting PDF Documents to AutoCAD
There are two ways to convert PDF to AutoCAD:
On the Menu bar:
Click on the File menu and then on Open and browse for the PDF that you want to convert to AutoCAD. Click on the Convert menu and then PDF to AutoCAD.
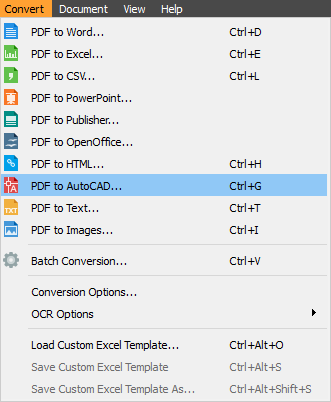
On the Toolbar:
Click on the Open icon to browse a PDF you want to convert. Click on the AutoCAD icon ![]() to convert a PDF to AutoCAD.
to convert a PDF to AutoCAD.
Select content for conversion Note: To learn how to select content, see Selecting Content.
There are two conversion file types to choose from: DWG (Drawing Format) or DXF (Drawing Exchange Format).
Other options you can change:
- Color palette: Standard (monochrome document) and RGB (polychrome document)
- Units: Millimetres or inches
- Polyline Width: from Source Document, Zero
- Insertion point: this option determent offset of starting point of coordinate system in output file.
- Scale: You can modify scale of output document. Output file size will be multiplied by provided value.
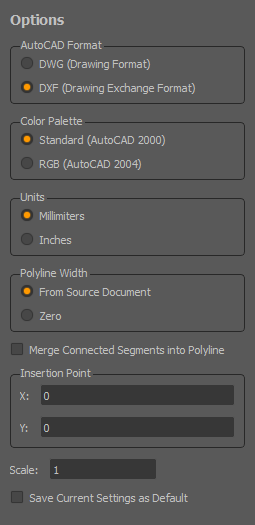
You can save the changes as default by ticking the box Save Current Settings as Default.
Click the Convert button once you set up all the changes.
Converting PDF Documents to Images
There are two ways to convert PDF to Images:
On the Menu bar:
Click on the File menu and then on Open and browse for the PDF that you want to convert to Image. Click on the Convert menu and then PDF to Images.
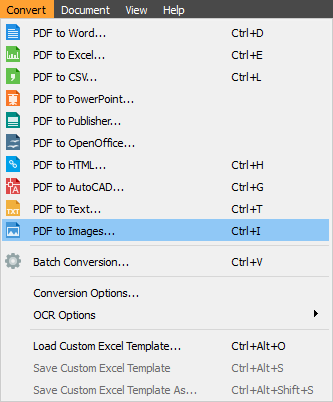
On the Toolbar:
Click on the Open icon to browse a PDF you want to convert. Click on the Images icon ![]() to convert a PDF to Image.
to convert a PDF to Image.
Select content for conversion Note: To learn how to select content, see Selecting Content.
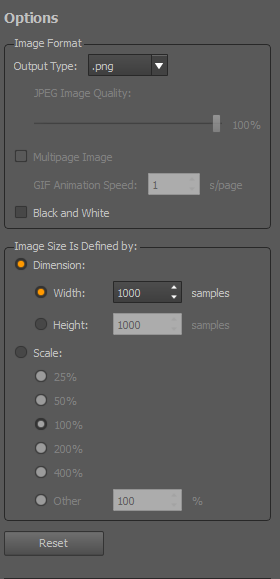
Image format options
- You can choose the following output types: png, jpg, bmp, gif, tiff.
- If you want to convert a PDF to jpg, you can set up image quality (from 1 to 100 %).
- You can set up the image to be black and white by ticking that box.
- The multipage image box is enabled for PDF to tiff and gif formats when you can set up the gif animation speed.
Image Size is defined by:
- Dimension option is for changing width and height.
- Scale option is for changing scale (25, 50, 100, 200, 400, or other).
If you want to set up these additional options from scratch, tick the Reset box.
Click the Convert button to convert a PDF to Image.
Converting Scanned PDF Documents
There are two types of PDF documents. Documents created with PDF software are called native PDFs and documents created with a scanner or other photo imaging tool are called scanned PDFs. Scanned PDFs are of poorer quality and not every PDF converter on the market can convert such files. To convert a scanned PDF file, you need to use PDF converter that has integrated OCR (Optical Character Recognition) technology. PDF Converter has integrated OCR engine which makes converting scanned PDFs possible. In certain cases, converting without OCR is a better solution and for that reason, the program has an option to manually change OCR settings.
So if you deal with scanned PDF documents, you need to turn on OCR engine before the conversion starts. Before you open a file and choose the type of conversion, click on the Edit menu bar and go to OCR options. Click on Convert Using OCR if your file is a scanned PDF. If you want to convert a PDF without OCR, click on Convert Without Using OCR.